Dental hygienists and shots
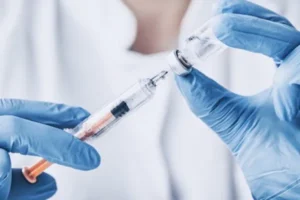
Advancements in local anesthesia training for dental hygienists have made it possible for better pain management at your dental practice.
Instead of relying on a sole injection administered by a dentist, patients can now receive local anesthetic for treatments that were once seen as something they needed to “grin and bear.”
However, you are now responsible for the ongoing training for your team.
Here are a few basic tips to keep things running smoothly.
Communication for anxiety reduction
Fear of injections is a primary cause for anxiety–even when the entire purpose of the injection is to protect the patient from greater pain.
To combat this fear, hygienists should learn to communicate each step of the process, in order to help reduce anxious anticipation.
- Helping the patient to feel in control will reduce anxiety. Hygienists should inform patients that they can raise their hand at any point during the process to signal pain or discomfort.
- Try to avoid negative words such as injection, shot, hurt or pain. Instead use phrases such as “administer anesthetic” or “numb your mouth.”
- Acknowledge patient concern and let them know you’ll make the process as easy as possible for them.
- Inform patients of the incredible technological advancements that make the stigma of dental treatments being painful as outdated.
Preparation of the syringe
- While rare, manufacturing error can leave a small barb on the needle that causes discomfort when removed. Quickly run a new syringe backwards through a sterile gauze to test for snagging.
- A cold syringe can provoke a psychological response where patients mistake the cold sensation for pain. Clinicians should warm the needle for approximately 30 seconds in their hand prior to administering the injection.
- Cartridges should be administered at room temperature. Neither cold nor warm.
- Do your best to keep the syringe out of the patient’s line of sight.
Patient positioning
Physiologically, best practice is to recline patients with their head and heart parallel to the floor, with feet slightly elevated.
Assisting a painless penetration
Pain free penetration is a three step process that begins with gentle palpation to identify structural landmarks and to prepare the tissue. Palpation is followed by one to two minutes of topical anesthetic application.
In most applications, the tissue should be pulled taut prior to penetration. Taut tissue allows for better visibility and minimal resistance. Never rush through the process. Studies show that a slower approach to local anesthetics is better received by patients.
Thoughts on advancement
With the exception of palatal injections, it’s unnecessary to deposit a few drops of local anesthetic prior to using the needle. However, for patients who are exceptionally apprehensive, this technique can serve a psychosomatic benefit by informing the patient that you’ll be injecting a small amount of anesthetic as you go for improved comfort.
The importance of TLC
Providing a positive experience for patients starts with a positive attitude. Simply reminding your hygiene team that atraumatic injections are possible will go a long way towards making sure every shot at your dental office is as pain free as possible.

